Transcript
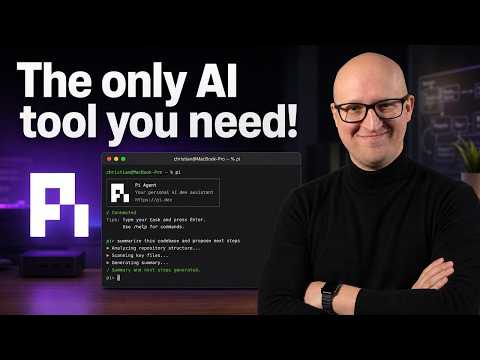
0:00 This is pie, a fully open source and minimal AI agent that runs directly inside your terminal. And I know what many of you guys are thinking right now. Oh man, Christian, why the heck another AI tool? And why should we care about in a home lab? And yes, you're right to question it. Honestly, I'm also very skeptical about any AI tool and content because there are literally just so many AI tools out there and every day there seems to be this new incredible thing everyone is hyped about on social media.
0:28 But pie is different than most other tools. This has become the one and only tool that I use for everything. From developing code to writing scripts and so with Terraform, other infrastructure as code files, but also doing operational work on my servers, infrastructure, container orchestration, any of my home lab stack. And it is absolutely amazing. The cool thing about pie is that while most other tools and agents built by these huge platforms like Cloud Code or OpenAI's Codex, they just try to add more and more features.
1:00 Pie is much more direct. There is no MCP setup, there are no sub agents, there are no permission pop-ups. This is really just using plain CLI tools and commands. And this is absolutely incredible. It is also completely open, so it supports more than 15 different providers and you can use API keys, you can use OAuth with your existing subscriptions, and you can even use local LLMs. So, let me show you what pie agent is about, what is my terminal setup for using this, and how I'm generally using agentic AI in a home lab. Before we jump in though, I quickly want to also show you how I'm accessing my home lab infrastructure securely from outside. Whenever I'm traveling or if I'd like to use my locally hosted LLMs from somewhere else, then my first choice is always TwinGate, the sponsor of today's video, because TwinGate is a secure, fast, and simple remote access tool. It is what we call a ZTNA and tech a zero trust network access platform and it establishes secure connections between all of your devices that always have to be verified and authorized, otherwise Twingate won't let the request go through. And the cool thing is that this technology even works through not devices and firewalls without any port forwarding or firewall exceptions required. So, you can just securely log into your devices no matter where you are or where you're connecting from. If you would like to try it out, then check out my other tutorials about how to install Twingate in your network and how to integrate it into your Docker, Kubernetes, or DevOps stack using Terraform. It is really cool solution and completely free for up to five users and connects to 10 different remote networks. So, start making your network more secure and accessible with Twingate. Of course, I'll drop you link to the website in the description box down below.
2:45 All right, guys. So, now let's get started with pie agent. This is the official website pie.dev where you can find the documentation and also the one-liner install command that you can just run on your favorite operating system and terminal setup. So, this works across Windows, Linux, and is supported on many different terminal emulators. So, you can use whatever you want. As some of you guys might know, my favorite terminal emulator is Warp, which by the way recently has become fully open source. I know many of you guys have complained about me using Warp, a proprietary terminal application that in the early days you had to log in first and accept telemetry, but now they literally changed everything. You can now find the entire source code of Warp terminal on GitHub. I'm honestly super excited about this and why I love using Warp for pie agent is that Warp has something new called third-party CLI agents. So, that means they will show you a coding agent toolbar and this works across all your coding agents. So, not just the integrated AI agent in Warp. You You also use this with cloud code, code X CLI, and even Pi agent is also fully supported. But again, this video is not about Warp, so maybe I'll do a separate video about it at some point. If we come back to the Pi agent, just know this is supported in many many terminal emulators across different operating systems, and you can use whatever is your favorite setup to just run this. Again, as I said, the interesting part about this application is that it does many many things different than most of the other huge tools out there like Claude code, code X CLI, and whatnot. This is really developed with the idea in mind that less is more. So, instead of just adding more and more features, the developer focused on the core abilities or the core utilities that you need for agentic AI coding such as agents.md context, skills, prompts, and support for different input modes. But there are no MCPs, there are no sub-agents, there are no permission pop-ups. So, if you were a little annoyed of like all of these coding agents asking "Hey, do you really want to execute this? Do you really want to change that file?" There's no such thing in Pi. There is no planning mode.
4:56 It is just plain CLI commands or just direct instructions with as less context as possible. So, that really also makes it a great tool for any local LLMs, at least in my opinion. And yeah, so once you have installed that, you can just execute it with a simple Pi command, and that starts the AI agent. The very first thing that you should always do is when you install Pi is to log in to your favorite provider. And there are two paths that you can choose. You can use a subscription from one of the big vendors like ChatGPT Plus or Claude Pro, Claude Max, or GitHub Copilot. But you can of course also use an API key, and there are many different providers supported out of the box like Amazon, Cloudflare, Deep Seek, Google Gemini, Rock, Hugging Face, MiniMax. But if you go to the documentation of Pi, there's also a part for custom providers, so you can configure in the models.json for Lama, LM Studio, and basically any other open AI compatible LLM. Once you've chosen your favorite provider, you logged in via API key or OAuth, you can use the {slash} model command to select your favorite coding model. My preferred choice is OpenAI's GPT-3.5, but of course you can also choose any other in that list here if you like. And then you can start, yeah, typing in prompts and start doing your work. I don't know how familiar you are in general with AI agents, but mostly you log in to any project directory where you want to use it, such as in my home lab directory.
6:24 There are many repositories that I use for agentic AI coding, like my GitLab repository where I'm managing deployments, resources, and other templates for my local GitLab instance. So, if I start Pi here in this repository, I can just start using it. For example, describe the Docker Compose file in this directory, and you can use the at symbol to add any file context. So, for example, if I'm going to search for my compose.yml file, for example, for the GitLab production setup, I can just add this in here, and it's then added to the context for the LLM. And as you can see, Pi is directly reading this files. There are really just a few core utilities that this thing is using to read and write files, execute commands in your terminal. And you can see that it immediately responded with the key points of this deployment, what it does, and just describing this. You can also see here in the Warp terminal, there's this um third-party CLI coding bar that I just talked about. Here you see the Pi icon, and you can just use the rich input from the Warp terminal, as well as having some other context about the directory, and so on. But Pi is also showing you the context and the thinking modes and the model that you have selected here in the bottom bar. Here, for example, you can see that it's running medium thinking mode and how much of the context window has already been consumed by the LLM. Now, if you want to change these kind of settings, you can just type in {slash} settings and then you can search for specific settings like thinking mode depending on what the provider and the LLM supports, you can change that. Again, for simple tasks, minimal or low reasoning is um probably enough, but if you need more complex coding tasks or any other complex thinking or reasoning levels, you can switch that easily. And what is also pretty cool, if you are in a prompt and you have a large conversation and you just want to execute some files on the shell, you of course don't want to quit the prompt session every time and return back. If you type in an exclamation mark, you can just execute any type of commands in your shell. For example, if you do an LS, that will be not sent as a prompt, but executed on the regular shell. Also pretty useful if, for example, you just want to run docker PS or whatever. also invoke specific commands directly when you're in a terminal session. For example, update all the repos here. This will be automatically sent to Pi and it will start executing simple scripts like bash scripts or simple commands that are very, very direct and use less context and are super fast. So, again, this is how you can start using Agentic AI for, I don't know, any type of terminal work that you're using. I'll just run through a couple of other examples how I'm personally using this. For example, can you check if my container is running?
9:13 So, then you can see how the Pi agent executes the commands. Here you can see that it returned with an error because it didn't really know that the Docker container is not running on my local system. So, I should be a little more descriptive with my prompts. For example, check on my remote server. Now, one thing that is also really important here, I didn't tell it exactly what my remote server is or where this Git app instance is actually deployed. So, you might be wondering why the heck does it know that it needs to SSH into my server production one and execute the docker PS command there. Because the PyCoding agent will automatically use the agents.md file in your directory. So, just like the readme file is there for humans to understand more about this project or repository, the agents.md file is for AI agents to understand the project context. And it is super important that when you're working with agentic AI, no matter if it's in your home lab or if you're programming any application to define that properly. You can read more about this on the website agents.md with some practical guidance on how to write such a file. The most important thing is that you just keep this minimal and add instructions that the LLM can better understand where to find things, where to look up, and how to operate in your specific projects. Like this is the agents.md file that I am usually creating for any repository project like a repository map that explains where to find specific things like my deployments for docker compose are in this directory. So, this is how the LLM figured out, "Okay, I need to look up the docker compose file there in this directory." And here in the deployment sections, it could also find out that, "Okay, the GitLab production one container is using this URL, this FQDN, and it's running on server production one as well as the runners and so on."
11:07 Take a closer look at that. I can show you a few examples right now if you're interested in. For example, I just showed you a simple prompt to summarize things or to query information, but you can also use coding agents for doing some operational tasks or operational work. For example, in this repository, I'm also managing my GitLab repos. And I'm using Terraform or infrastructure as code for doing this. Here you can see I'm creating different Terraform files for each of the Home Lab repositories that I've created that define all of the resource settings, any variables, any labels, or the visibility level of this repo and stuff like that. And then I use the OpenTofu command to apply these resources on my GitLab infrastructure.
11:52 And because of these instructions, I can do some really amazing things. For example, if I need a new repository, let's just execute create a new test repo for my user and then just run the Pi Agent in this session here. And if you pay attention to some of the reasoning output here, you can see that it directly understands that I'm managing my repositories in infrastructure as code files because I've explained this here in the agents.md. Before creating or changing resources such as repositories, projects, and so on, inspect existing files and follow the same structure, naming, indentation, and file-per-resource Terraform patterns and prefer managing GitLab resources through OpenTofu in the Terraform directory instead of manual UI or API changes. So, that means that if you define these instructions how to operate for creating certain tasks, the Pi Agent will automatically use that context to do exactly what you want. You just have to be very specific with your instructions in the agent.md, but this is how you speed up your workflow. Here, for example, you can see it reads some of because I told it, "Hey, you need to follow the same patterns." And then I've also added an instruction that it does not need to execute the Terraform project locally, so it will just validate it, but then it will make the push on my Git repository and not apply this locally because I'm managing these type of resources in CI/CD. All right.
13:23 But yeah, that's it about um agents.md file, some basic commands in Pi Agent. As you can see, it is absolutely amazing, but it has many other capabilities. For example, if we quit that and you just realize, "Oh, no, I want to continue with that previous uh conversation." then just execute Pi with a dash r um argument. So, that will resume the session. You can also select the session that you have been working on, and then you're back into the session. The sessions are always stored in a tree view. So, for example, with the {slash} tree, you can look that up and easily review all the different commands the uh session has executed, the prompts you had sent it, and you can easily revert or switch back in time. This does not automatically revert all the file changes, of course, but you can set the session back to a previous state, and then you can tell the LLM, "Hey, restore all the files from that timestamp." for example, using Git. If you want to split sessions, for example, you have a problem that you want to work in different sessions, yeah, from that point on, then you can also use the {slash} fork to create a new fork from previous user messages. Also super useful. And one thing that might be interesting for people that use local LLMs, but also sometimes on ChatGPT or Claude, if you're working on larger projects, from time to time, you're running out of context window. So, then you can use the compact command to compact the session context. Because when you're working on larger conversations, the LLM at some point will run out of context window, and it will start forgetting things that happened in earlier prompts before.
15:08 Therefore, from time to time, it is useful to compress the session. Also super useful. You can manually compact the session context, for example, say, "Keep all important deployment changes and decisions." something like this, and then it will start compressing the session. Doesn't really make sense in this session because it hasn't been long, but anyways, there you can see it compacted from 8,000 tokens. So, yeah, that's it about some of the useful commands here, but there is a lot more to explore because although Pi has been created with simplicity in mind and intentionally be very small, that does not mean that it is limited. For example, if you go to the Pi directory in your local setup, there are directories for extensions, prompts, and skills. If you go to prompts, you can add specific markdown files. For example, if you have created a large prompt that you regularly want to use in the same way, then just define it as a markdown file here, and then it becomes a slash command. If we create a new file review.md, for example, and we usually start with a small front meta section, description, do a coding review, review the referenced files, or current project, focus on bug, security issues, missing error handling, and stuff like that. You save this, and then you go back into your project, execute Pi, and then you can use slash review, and that will do the coding review or whatever you have defined in that markdown file.
16:37 And I think if you regularly do the same kind of processes and standardize how you actually work with coding agents, I think you can save yourself so much valuable time by just defining regular things that you always do in your projects. And just like this review command, you can do other things, for example, defining skills. I personally haven't used that a lot to be honest because I'm defining things mostly in prompts, but at some point in the future I will also start using skills. And there are, of course, on the internet people sharing their best practices, their skills, their prompts, and whatnot. By the way, here on the website you'll find some great community plugins or extensions. For example, one thing that I found to be super useful is the LM Studio extension or by Max Studio.
17:24 I'm using this to experiment with local LLM. Maybe I'll do a separate video about this. If you want to see that, leave me some comments. But if you want to install any kind of extensions, just search them here on the website or use the NPM search Pi command. So, then you can also find some packages for the Pi agent. So, yeah, as you can hear, I'm pretty excited about it. I hope I've shown you some practical use cases. I think there's just one thing that I need to say at the end. I absolutely love that this is super simple, small, it does execute direct CLI commands, it does not have any permission pop-ups or anything like this. But it is also sometimes a bit risky because if you just tell Pi agent, "Hey, please destroy my deployment on server XYZ." It will just do that without asking you another time. There are literally no guardrails inside the Pi agent because it's developed with this idea in mind. But it is basically up to you to add guardrails to your agent.d file or to be very specific with your prompts and your expectations. Because many other tools like Code X CLI or Cloud Code, they sometimes are annoying with these permission questions and stuff like that. But it's also certainly a bit safer to do that than just fire everything in the terminal. But yeah, again, this has become literally the one and only tool that I'm using for agentic AI coding and for working on my DevOps projects, on my home lab projects. It is absolutely amazing and in my opinion, it beats any of the large proprietary solutions or even the open source CLI tools of Cloud Code, Code X, whatever. I think Pi is, in my opinion, much better because it's smaller, it's direct, and you can better adapt this to your personal workflows, at least in my opinion. But, now it's your turn, so please tell me what do you think about Pi Agent? Was this helpful? Do you want to learn more about Agentic AI coding in a homelab or how I'm developing my homelab stack? Then please leave me some comments. And as always, don't forget to give this video a like and subscribe to the channel if you want to see more tutorials for homelab or maybe even about open-source AI tools about self-hosting and any of these topics, then join our community. Thank you so much for watching. Thanks a lot to all the supporters and members of our community. You guys are really amazing.
19:43 And of course, I'm going to catch you in the next video. Take care. Bye-bye.
Summary
- Pie operates directly in the terminal, avoiding complex setups and permission prompts.
- It supports over 15 providers, allowing integration with various APIs and local LLMs.
- Users can execute commands and scripts directly, enhancing workflow efficiency.
- The agent utilizes an `agents.md` file to understand project context, improving task execution.
- Commands can be compacted to manage context windows effectively during longer sessions.
- Users can create custom prompts and skills to standardize repetitive tasks.
- The tool is designed for simplicity, but this can lead to risks if commands are not carefully managed.
- The developer community is encouraged to share best practices and extensions for enhanced functionality.